
Five minute amaryllis how-to, more bulbs, and the smug-making art of tidying ones shed

Hello friends!
You are the loveliest, kindest, funniest lot and I need to thank you AGAIN for all the brilliant messages. I love receiving them...questions, comments, rants, sonnets, garden-related or otherwise...they make my day.
My five minute forays this week:
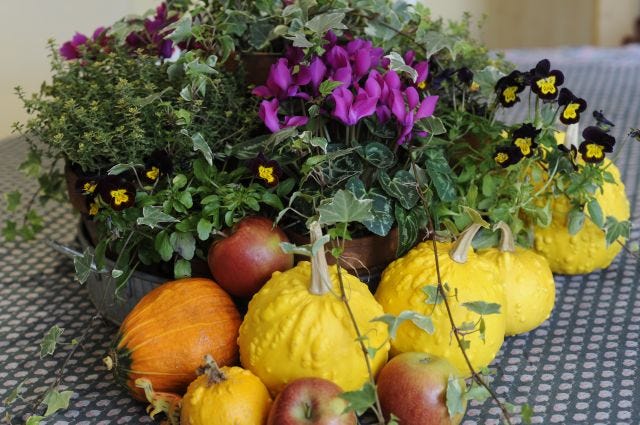
Monday: I survey the horror of the post firework night mess, and studiously ignore it, whilst I plant three Japanese anemones which I found on sale in my local nursery. Actually this is a superb time to go searching for bargains at the garden centre, as all of the un-sold perennials, which have finished flowering and therefore lost their allure to most customers, will have to be over-wintered by them, which means they take up space, and manpower for watering etc. As a result lots of these plants are offered at reduced prices at this, the very BEST moment for planting them...so hurry off and see what you can find, get it in the ground and feel smug why don't you?
Tuesday: A two year old is about to turn three. No gardening.
Wednesday: I panic buy more bulbs. I don't know why I am surprised by this measure; it happens every year. Incapable of taking my own advice and ordering three times the number of bulbs I think I need, I always end up with too few. The problem has its roots in feeling that there isn't enough money for bulbs. Inevitably though, I end up spending more than I would have had I ordered in bulk. Someone please copy and paste this and send it to me next year. PLEASE. Someone quite rightly asked how I avoid digging up other bulbs while I put in new ones. The answer is I don't. Obviously I take rather more care with the planting when I know there are already bulbs in the vicinity. I use a bulb-planter and I concentrate on small spaces between plants, that I know I would have been too lazy to attempt planting into previously.
Thursday: Beloved Instagram friends are utterly shocked at the state of my shed, which was once a beautiful garden office and is now a dumping ground for all sorts of things. These darling people (and thank you if you are one of them) have sent me encouraging (and stern) messages saying that I should re-claim this space, and so I resolve to do a five minute purge and see where it gets me. Two hours later, I emerge, dusty and sneezing, and extremely smug and happy, because although there's still much to be done, the floor is clear, and several items (including a damaged lantern and a shabby chic shelving unit) have been re-homed to people who will fix/cherish/appreciate them. Other things have been put where they actually belong, or listed on eBay. Hardly anything ended up in the rubbish. If you have a space like this I would urge you to tackle it. Begin with a five minute intention...nothing more. You never know where it may take you.
Friday: During my shed tidy I unearthed three amaryllis bulbs - two new ones to which I had treated myself when I ordered my bulbs, and one from last year. I used to have a collection of these bulbs but they somehow got lost or perished when I moved house. I'll tackle the whole subject of keeping them alive year-on-year once they've had their moment, but for now, here is the very simple lowdown on how to plant them.
Amaryllis
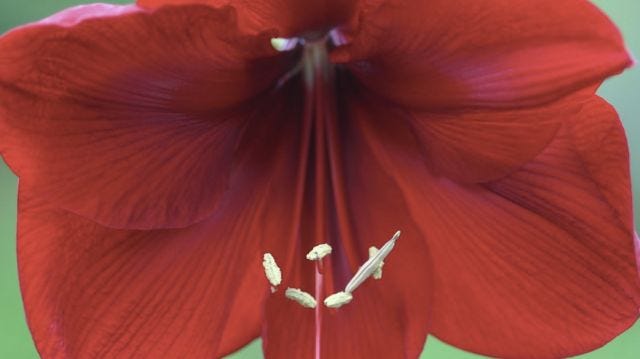
Amaryllis are actually called Hippeastrum. Nobody ever uses that name though. They are expensive (about £10 a bulb) but the amazing display they put on makes them more than worth the money. They come in shades of pink and white, and beauteous reds like the one above. The petals are velvety and the stems are massive and fleshy. You could grow loads in plastic pots and then cut them for vases if you liked. You can buy them in gift boxes with a pot etc, or loose, and use your own pots.
Soak the bulbs for a couple of hours in luke warm water to wake the roots from their slumber.
Mix together some one part multi-purpose compost with two parts John Innes no 2. This is the ideal mix but a pre-bagged mix is absolutely fine. Bulb fibre is also fine (and essential if you are using china pots with no drainage).
I like to use smallish terracotta pots with some depth to them - basically a mini-long-tom pot. The diameter of the pot only needs to be a few centimetres larger than that of the bulb; this thing is growing UP and DOWN rather than OUT.
Fill your containers with compost and place the soaked bulb gently on top so that the fattest part of the bulb (the middle of it) comes to two centimetres below the lip of the pot. Back-fill with more compost and firm gently, and you're done.
Water well, so that you can see water coming out of the bottom of the pot. If you're using bulb fibre and a china bowl then you will have to guess when to stop watering so that the compost becomes damp but not wet (something I hate doing, which is why I use pots with drainage holes).
Put the pots on saucers and bring them inside. A shed or an unheated room is fine for this, as long as they're by a window. Once they begin growing you can rotate the pot every now and then to keep the stem straight.
All the good things, always
x Laetitia
___________________________________________________________________________________
Daily posts on instagram www.instagram.com/laetitiamaklouf
You can find my books here and here (Sweet Peas for Summer is a bargain right now at only £2.99!)
Do you Pinterest? Is that even a verb? Anyway, I love it and you can find me here
_________________________________________________________________________
This will be a weekly newsletter, no more than that, but I realise that, having not heard from me for a while, some of you may not want it, in which case I don't want to spam you so please do feel free to hit 'unsubscribe' (I won't cry, honest...well okay, maybe just a little bit😉)