
Candle pot how-to, wreaths, leaves, mulch and drilling holes into nuts ...

Hello friends!
The weeks are whizzing by rather alarmingly. It's Christmas in a minute and as promised, here is my Christmas table Plan B, because my paperwhites peaked too early (I was too organised for my own good, and those warm October days made them bolt up out of their bulbs before I could blink!) Has this happened to anyone else? Please drop me a line and let me know I'm not alone!
My five minute gardening forays this week:
Monday: The kind neighbour who lent me her vases for my Rotter's party has gently nudged me to bring them back, and so I have a load of ivy stems. I decide to begin my wreath-making and gather small bunches by taking three or four stems, wiring them together and plonking them in a bucket, to be joined by more when I have the time.
Tuesday: I clear a few leaves from underneath the apple tree. There's a bit of a balance to be struck between keeping things looking good, and making sure that the soil is fed. Leaf-litter is great for the flowerbeds, but it doesn't look very nice when you've got brown slimy leaves smothering the plants, so I do a little bit of fussing (and this is what it is really)...teasing out the stems of the plants and slightly shaking them so as to let the leaf litter fall through the foliage and into the gaps between the plants. The best way to describe the action is to imagine you are a very expensive hairdresser...you know how they fuss around with your hair while they're cutting it, pulling it from the roots, shaking it and letting it fall - that's what I did with the plants. Any rotten apples and excess leaves I spread over a clear, unplanted area at the back of a border. What I'm really saying here is that there's very little need to bag leaves up in plastic and send them to the rubbish; either chop them up with a lawnmower and use them for leaf-mould, or leave them where they are and let them enrich your garden.
Wednesday: I make a wreath. It is truly the most slapdash thing I've ever done and yet I love it more than all the other wreaths I've ever laboured over. I think this is because it is VAST. There is something about a massive wreath that makes my heart sing with joy. I'm using ivy as usual, because I have it growing in the garden, and it is therefore readily available (and more importantly, free). The wreath is undecorated at present, but I plan to anoint it with silver-sprayed walnuts, which I made about a decade ago. The size of this wreath means that I need more though, so I put walnuts on the shopping list and leave it at that.
Thursday: I empty three bags of manure underneath my new hedge, spread it about, and marvel at how lovely it all looks.
Friday: I buy walnuts and get my drill out to make the wreath decorations. This involves spending a rather tranquil twenty minutes sitting on the floor with the drill resting on my knees, boring a hole into either side of each nut and then feeding a bit of wire through. I make about 12 and decide that's quite enough. All they need now is some silver spray. I also knock up a candle pot for you lovely newsletter friends. These make rather beautiful, simple table decorations which are long-lasting and also double up as candlesticks. Here is how to do it:
Candle pots
You need:
Some small terracotta pots, (or you could use any collection of containers...a long trough would be good here too.
Florists oasis - you can buy this either online or at your local florist.
Candles - make sure they are the right size for the proportions of your container.
Toothpicks
Masking tape

Foliage - any christmassy foliage will do here, as long as the stems are stiff, because you can't stick floppy stuff into oasis. Mature ivy, holly, fir, eucalyptus, viburnum, bay, laurel, pittosporum etc etc...
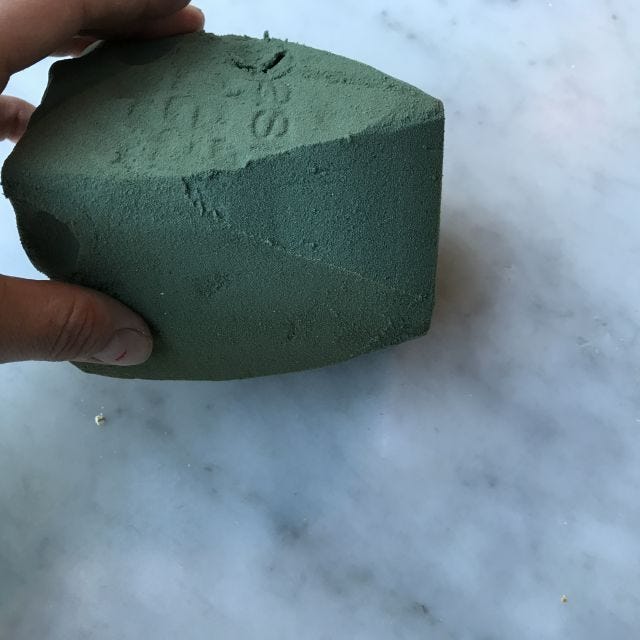
First you need to get the oasis to fit the container - for tapered containers this means shaving off a the corners a bit - easy with a kitchen knife. NB your oasis doesn't have to fill the entire diameter of the top of the pot...it's fine if there are gaps.
Put the oasis into a large bowl of water and set aside for an hour or so to get totally saturated.
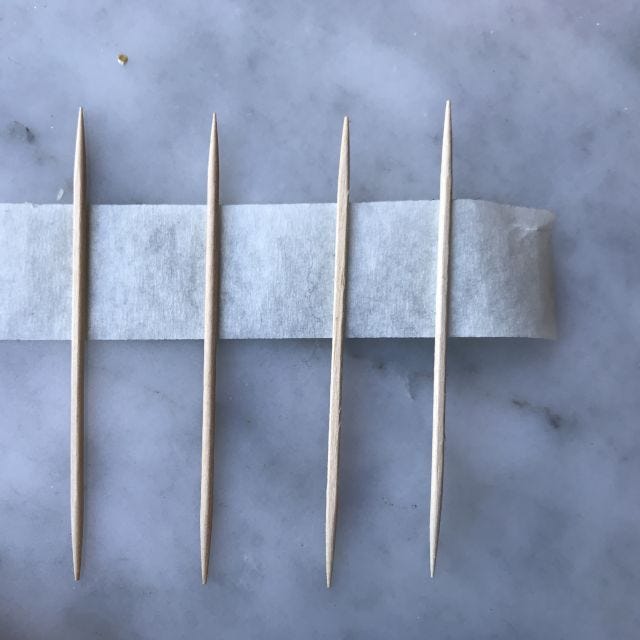
Now take a piece of masking tape and place three or four toothpicks along it roughly a cm or so apart (see pic).
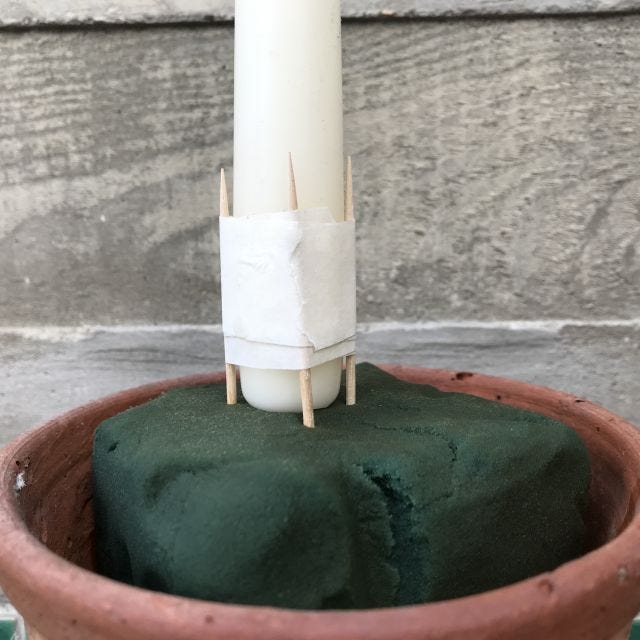
Now stick this lot on the end of your candle...

..with some extra tape around it to keep the whole thing really steady.
When your oasis is ready, you can stab the candle into the centre:
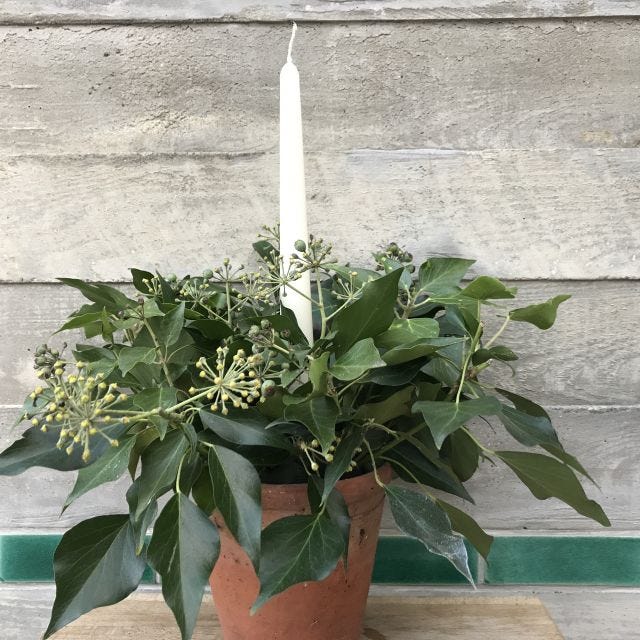
...and then add your foliage - poking bits in here and there until all the ugly bits are covered. And that's it! These will keep for a while - I'll be doing all of mine a few days before Christmas day, and if I'm feeling like it I might get something extra fancy to poke in and around the foliage (roses might make a naughty appearance)...but more likely I will just leave it at that.
Wishing you all the good things, always
xx Laetitia